In my first two post I examined terrain analysis via OCOKA and an abbreviated process for identifying enemy Courses of Action (COAs). This led to the development of a plan for the deployment of the forces I would have on hand at the beginning of the battle. As we saw in my second post, taking the time to do this planning upfront allow the elements of an US infantry battalion to render a Soviet Tank Regiment combat ineffective in about 30 minutes of fighting.
 |
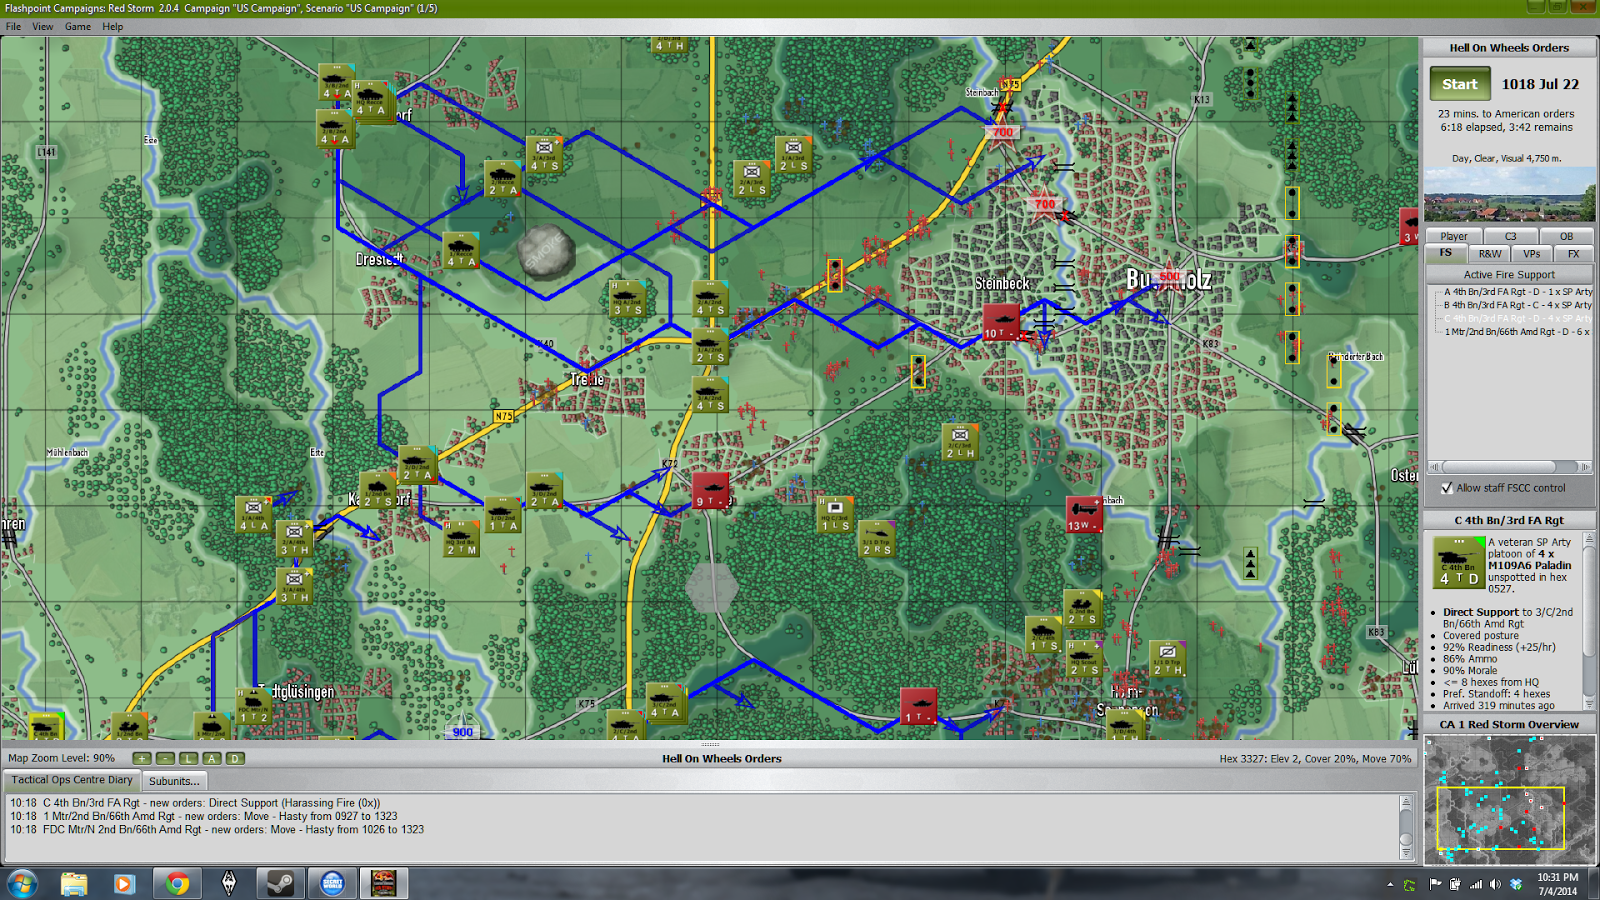
| Remnants of a Soviet Tank Regiment at Holm-Seppensen |
"But Doug," you lament, "despite turning the exciting process of playing a wargame into a pedantic planning process, you've yet to remove all the fun from my life completely! Surely, there must be something else you can do!"
Have no fear. For those truly dedicated to the idea of planning the chaotic fun out of your wargaming experience, I hear you. Making this really feel like work will require the big guns. It's going to require...a spreadsheet.
The Phase Matrix
Prior to participating in the Staff Wargaming sessions at Origins I was familiar with OCOKA (or OACOK as we were actually taught) and the idea behind COAs. What I'd never been exposed to though was something I found to be an invaluable tool: the Phase Matrix. Mark Graves, my invaluable mentor in all thing MDMP, tells me that despite how useful this tool is, many actual military units don't use it. Certainly how I'm going to use it is a much reduced and simplified version of how it would be actually used, but I think if you can take the time to do it you'll be very pleased at the results.
In short, the Phase Matrix (as I use it here) is simply a spreadsheet listing all available units on one side and all of the phases of the current operation along the top. Your job when formulating your plan is then to specify in the resulting matrix what each unit is supposed to be doing in each phase of the operation. At the level of command simulated in Flashpoint Campaigns: Red Storm you can usually get away with doing this for battalions. Certainly there's not much need to get more specific than companies except in special cases.
For this scenario I've planned at the company level. Here's what part of the matrix looks like:
 |
| Phase Matrix for 3-41 Infantry |
Coming up with the list of units you have to work with isn't tough; most games will provide you with an Order of Battle (OOB) for your forces. FPC:RS also provides a listing of when various units are expected to arrive as reinforcements. Between the two you can get a sense of what you'll have and when you can expect it, which will dictate a fair amount of your plan.
Developing phases is a combination of knowing what you'll have when, your terrain analysis, and the COAs you've developed. To help figure out the phases of the operation and develop my Phase Matrix, I make use of a final type of graphical control measure; the phase line.
 |
| Planning map with Phase Lines |
PL Vampire represents the line where I expect to have initial contact with the Soviet forces. When enemy troops cross this phase line, I know that I'm in Phase 1 of my plan as defined in the Phase Matrix.
PL Zombie represents the line where Soviet forces will have penetrated far enough that my initially deployed units are in danger of being flanked or overrun. Enemy troops crossing this line in force anywhere along its length are an indication that we are now in Phase 2 of the plan, and that I should begin withdrawing my forces to a safer position while delaying the enemy. Later, if all is going according to plan, elements of 2-66 Armored crossing this line going east is an indication that we've entered Phase 4 of the plan and the battle of annihilation has started.
PL Werewolf is positioned along the critical defensive river line that defines the forward edge of the task force rear area, as well as the best place to try and stop a runaway Soviet attack that has punched through my defenses. If you check the Phase Matrix, most of the units I've positioned in reserve are on or near this line. If enemy troops cross this line, again in force, it's an indicator that I need to commit my reserves to stop the incipient breakout. Also, if everything is going to plan, this is the line of departure for 2-66 Armored in Phase 3, the US counterattack.
So, with those phase lines defined, an OOB and a reinforcement schedule, I can plan, company by company, where each unit needs to be when. I can also define some triggers for when unit behavior needs to change and when each phase of my plan kicks off.
Of course, "no plan survives contact with the enemy." There's no question as the situation develops that the Phase Matrix and overall plan are going to become outdated. On an actual US Army staff that's where the S5 will earn his pay, updating the plan and developing contingencies in advance, trying to anticipate those changes. So, despite having a plan you should always be asking yourself "what happens if the enemy does this?" and envisioning alternatives to what you've planned.
Now that we have a plan, let's return to the battle in progress and see how things conform to our planning.

As we enter the second hour of the battle, the Soviets haven't thrown in the towel down south. C and D companies 4-41 are hit with an attack by an MRB supported by artillery and tanks. My troops are tired (low readiness) and running out of ammo from the intense fight against the Tank Regiment in the past hour. This allows the MRB to gain a foothold in Holm-Seppensen and contest the victory location.

In the center sector, there can't be much doubt that the Soviets are making use of COA-2. At least a Tank Battalion and an MRB seem to be pushing for the Buchholz crossings and into the gap.

The Soviets keep the pressure on as the battle advances into the third hour. D/3-41 is slow taking up positions southwest of the A1-N3 junction. That allows a Soviet CRP to scoot all the way across the A1 unopposed and head south along the N3, threatening the route I'd planned to use to pull back A/3-41 and flanking B/3-41. That's enough force to convince me that we've entered Phase 2. I start to pull back the infantry companies of 3-41. To aid the withdrawal, I order ICM strikes on some of the lead Soviet units and have dropped some mines to block the roads.

I've been too slow in pulling back B/3-41 and the company takes a pounding. The other two companies are battered, but the TOWs and cannon of their M2A1s, along with artillery and mines, have taken a toll on the advancing Soviets. There are Soviet troops west of the N3-N75 junction though, and not much to stop them.

At that moment A/4-41 arrives as reinforcements. My Phase Matrix assigns them to a reserve position at Todtglusingen, but in light of the situation, I order them to take up positions in Kakenstorf. That should take some pressure off of the retreating remnants of B/3-41 and deny the crossing at Kakenstorf to the Soviets until more help can arrive. I hope.
Meanwhile, vicious house-to-house fighting continues in Holm-Seppensen. The Soviets have thrown in a couple of more tank companies, and the exhausted soldiers of C and D companies 4-41 are barely hanging on. Control of the objective flips back and forth as the battle rages.

The Soviets push southwest along the N75, driving for the Kakenstorf crossing. A/4-41 races to get into position to stop them while the infantry companies of 3-31 struggle to get to their fallback positions while under fire. I pound the advancing Soviet columns with artillery, TOW and cannon fire.
We're around four hours into the battle now. Soviet losses are high. I've lost more than I'd hoped, but the Soviet advance is showing signs of bogging down. To the northwest, around Hollenstedt the recce unit of the 2-66 arrives and is sent toward their specified destination of Wenzentorf.

A/4-41, backed up by artillery, stops the Soviet drive on Kakenstorf cold. A pair of Tank companies turns north and tries to advance up the N3 but are seriously depleted by the finally in position D/3-41.

Stopping the Soviet advance around the N3-N75 junction seems to have been enough for them. Soviet loses are at 70% while I still have 75% of my force intact. This is unquestionably a NATO victory at this point, even if FPC:RS decides to call it a "Marginal Success."
If I'd been a bit earlier in starting to pull back 3-31, Soviet casualties might have been a bit less at this point - as would have mine, which is what I was actually intending. It can be very difficult to disengage under fire.
Normally I'd probably allow the battle to end at this point, rather than risk further casualties, but where would be the fun in that? I want to see how my plan for a counter-attack by the 2-66 plays out.

Another mistake I made was not being sufficiently flexible in Holm-Seppensen. I've tried to hold the victory location rather than backing off to the high ground and letting ranged fire and artillery bleed the Soviets before launching a coordinated counter-attack. As a result, C & D companies are battered and I've largely been pushed out of the town.

All companies of 2-66 but B/2-66 have arrived. I begin to position them to launch Phase 3.

Planned movements for Phase 3. A/2-66 was slotted to attack the A1-N3 road junction, but after the CRP passed through there's been no further Soviet movement in that sector. D/3-41 is positioned to stop any future movement there, so I redirect A/2-66 to attack the N3-N75 junction, securing a route of advance for B/2-66, originally tasked with this assault.
To the south, C/2-66, in reserve at the K75-Este crossing, is sent to clean the Soviets out of Holm-Seppensen, and then turn north to drive into Buchholz from the south - again an adaptation of the original plan.
Finally, D/2-66 will attack from the N75-Este crossing along the K72 and retake Sprotze, guarding the southern flank of the main attack by 2-66. A/4-41 will go into reserve along the river line.
A little over six hours elapsed. 2-66 closes on PL Zombie to kick off Phase 4.

2-66's attack on the N3-N75 junction and Sprotze kicking off Phase 4. I got a little sloppy here and allowed D/2-66 to attack an intact Soviet Tank company in Sprotze piecemeal, by assault. That bit of hubris cost me most of the company. One day I'll remember that NATO does best at stand-off distances...

The remainder of 2-66's attack, backed by artillery and a pair of A-10s simply steamrollered the remaining Soviet units. As you can see from the VP totals and the kill claims, the Soviet battle group has essentially ceased to exist. A bit more careful management of my troops could well have saved me enough casualties to give me the 84% necessary for a Decisive Success.
 |
| The final tally |
All-in-all, it seems like my plan worked pretty well this time, with some minor adjustments. While this isn't always the case, taking the time to use some of the planning processes I've outlined in this series of posts does seem to do what the Army wants it to do - help you win battles. Some of the tools might seem to be time consuming to implement at first but with some practice can be used easily and effectively in a wargaming situation. In real combat and training situations, planning like this takes hours, as it should when the stakes are that much higher.
This has been the most popular and commented on set of posts I've ever done. Pulling these together would have not been possible without the advice and support of Dr. James Sterrett of the US Army Command and General Staff College, Mark Graves, US Army (ret.), Brant Guillory, US Army (ret.) of Grogheads, the great crew of forum regulars at Grogheads, Chris Maiorana, my frequent PBEM opponent of The Sharp End Gaming, and of course the team at On Target Simulations for producing Flashpoint Campaigns: Red Storm, the best land combat command simulator at this scale available today. These gentlemen have been the source of much learning for me. Any and all errors in my application of their teaching are my own.
Doug what a tremendous job. You annihilated them. The posts have been great fun to read and very informative and I am trying to employ these same thoughts myself now.
ReplyDeleteThanks Chris. Maybe I'm atypical, but I do enjoy the planning prior to really launching into the game. I'm hoping FPC:RS 2.1 adds a "planning layer" that allows for graphical control measures and allows some of this to be done in game. Jim and Rob both indicated that they're looking into adding something like that.
DeleteObviously, the other game that's a natural for this is Command Ops. While US doctrine wasn't this advanced in WWII, it wasn't far off, either.
More games need to incorporate the planning and recon phases of battle more effectively.
This is great. One thing that I would like to do is to develop better instincts for the pace of battle -- i.e., where it's reasonable to draw those phase lines and when one should expect one phase to end and the next to begin. I tend to start battles either too far forward (i.e., the enemy is jammed in my face) or too far back (giving up ground). Some of this may be a reconnaissance failure, but it would be good to have a view on where things should start.
ReplyDelete